ruoyi框架学习-1-环境准备
ruoyi框架学习
虚拟机内安装必要组件
安装mysql
1 | docker run --name test-mysql -p 13306:3306 -e MYSQL_ROOT_PASSWORD=123456 -d mysql:5.7 |
安装 zk / kafka /redis
docker-compose up -d
1 | version: '3.8' |
wnindows环境准备
组件版本不对可能会有异常报错.可以自行尝试
java
使用的版本是 1.8
maven
使用版本是 3.9.2
node
使用的版本是 v10.24.1
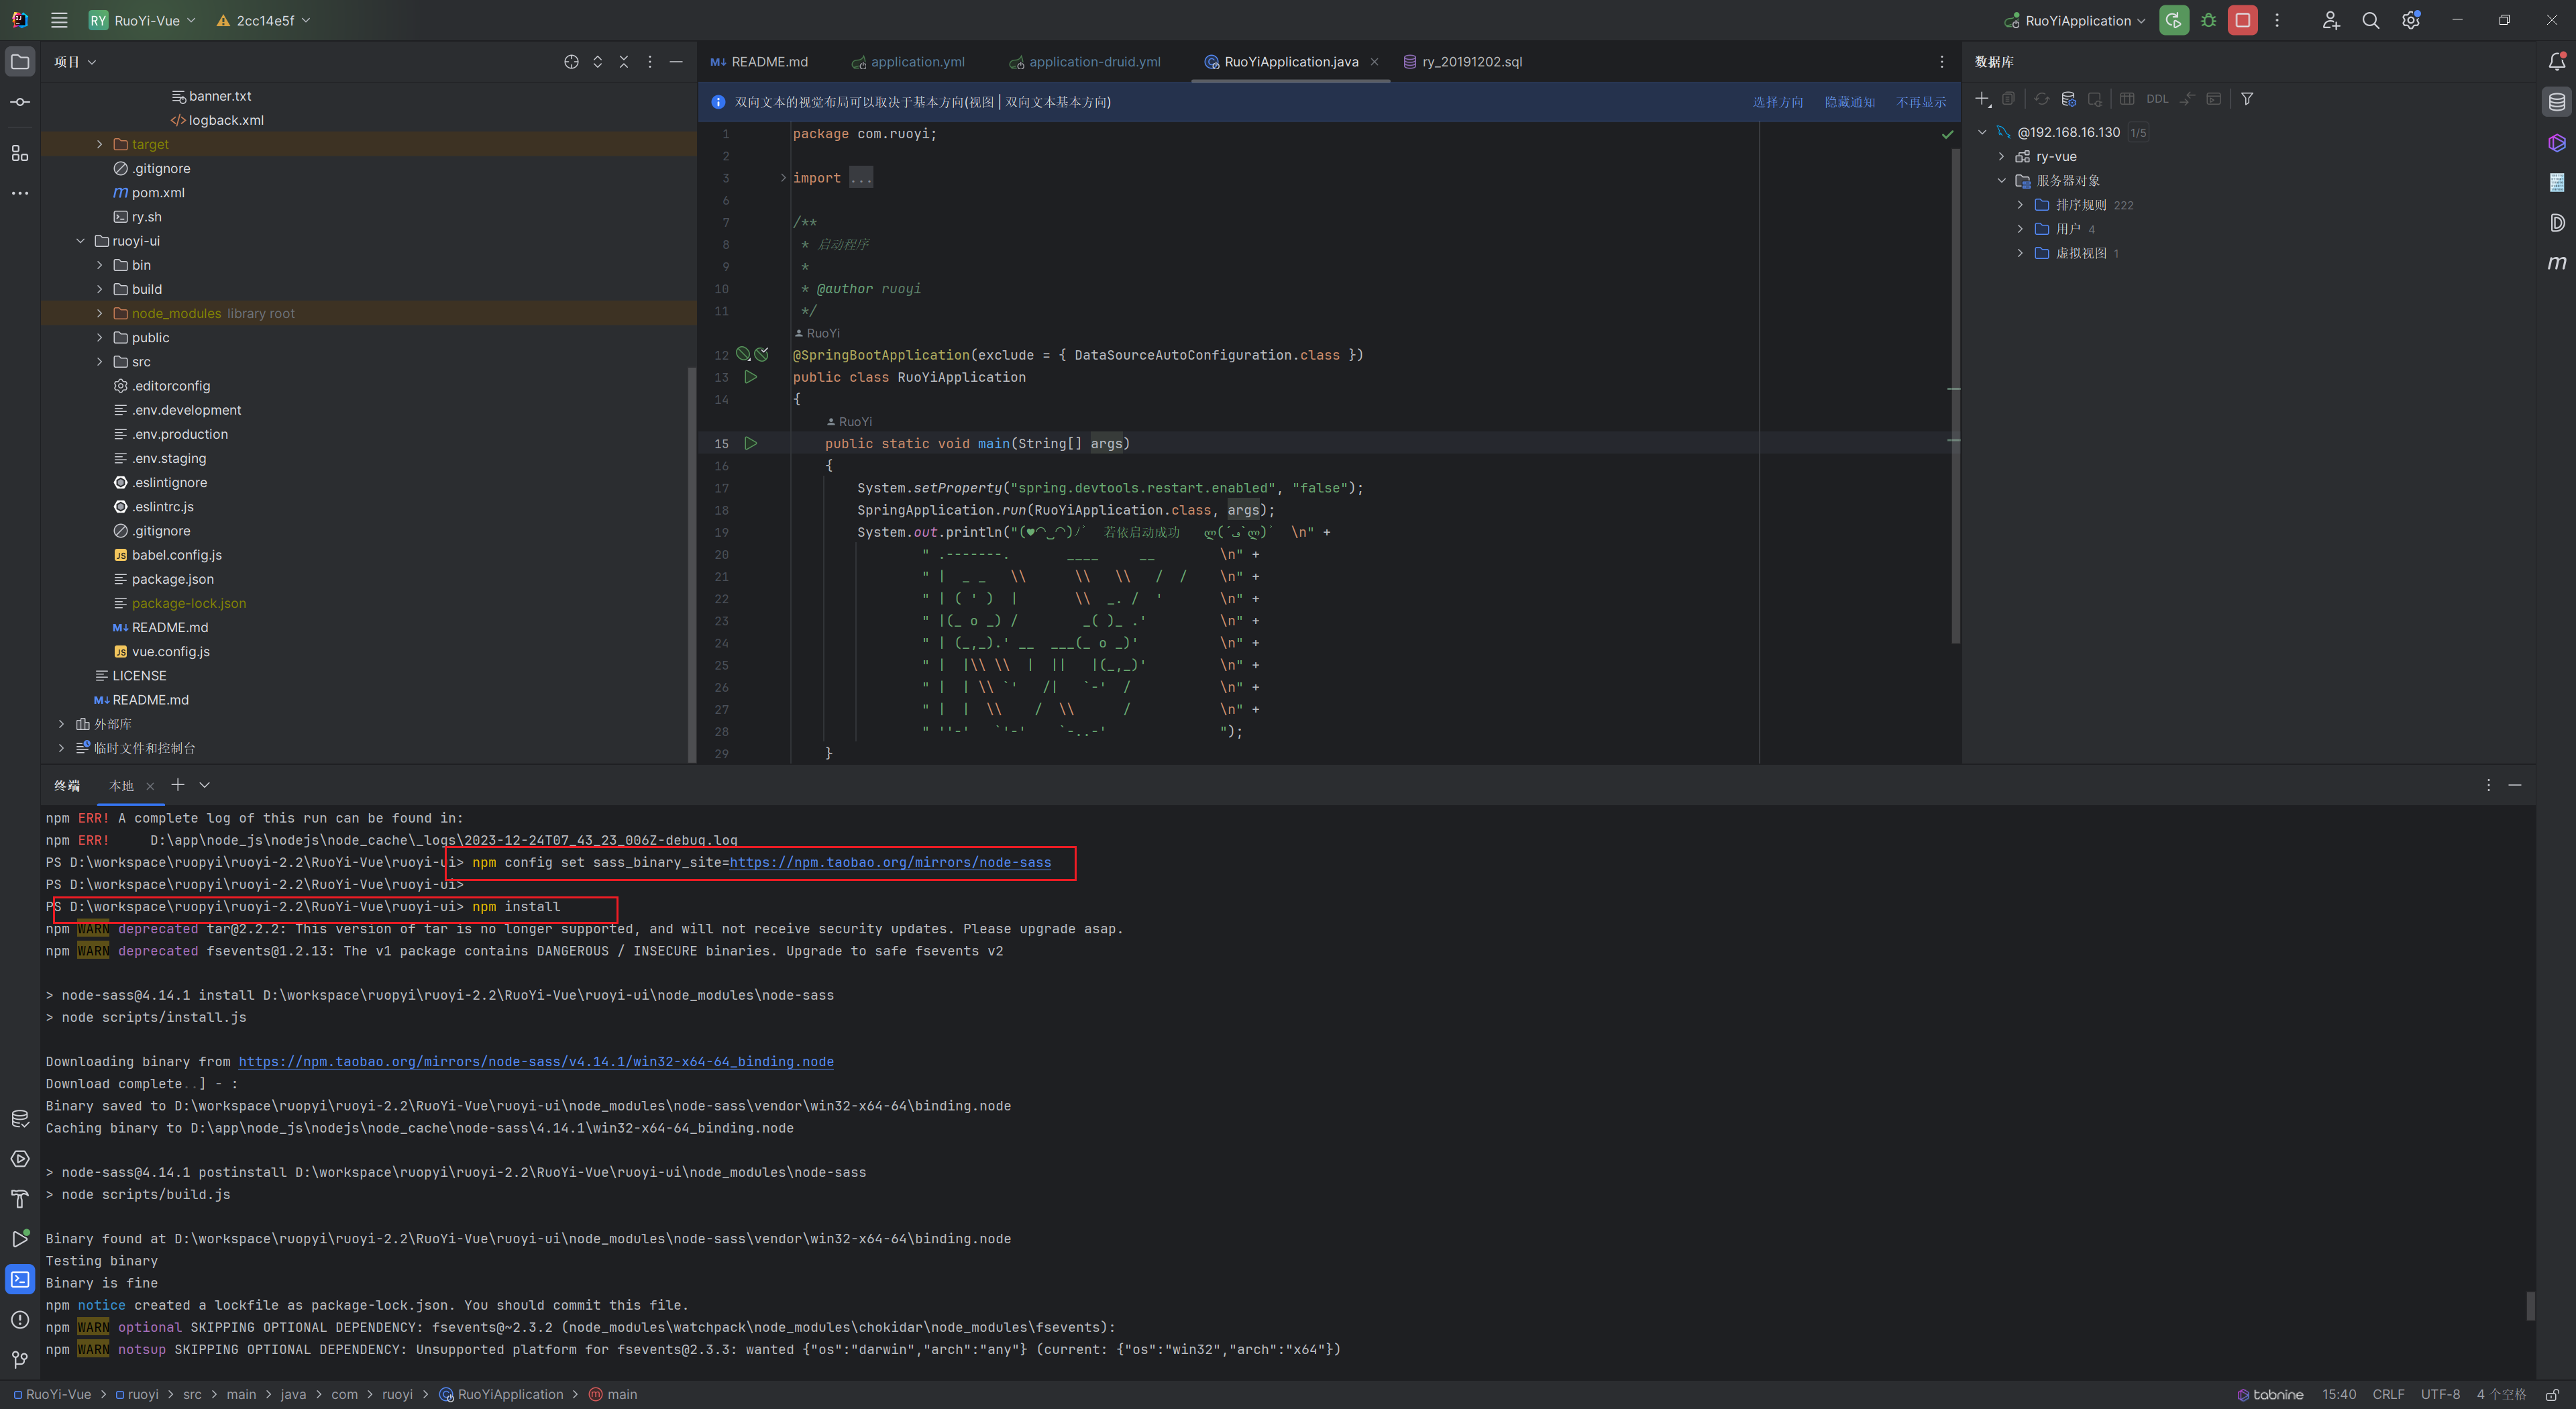
记得修改为国内源
下载项目(以2.2vue版本为例)
1 | git clone -v v2.2 https://gitee.com/y_project/RuoYi-Vue.git |
idea打开项目
后端项目修改配置
创建数据库
并执行RuoYi-Vue\ruoyi\sql 中的脚本初始化数据库
修改文件RuoYi-Vue\ruoyi\src\main\resources\application-druid.yml.包括数据库连接redis连接
就可以启动了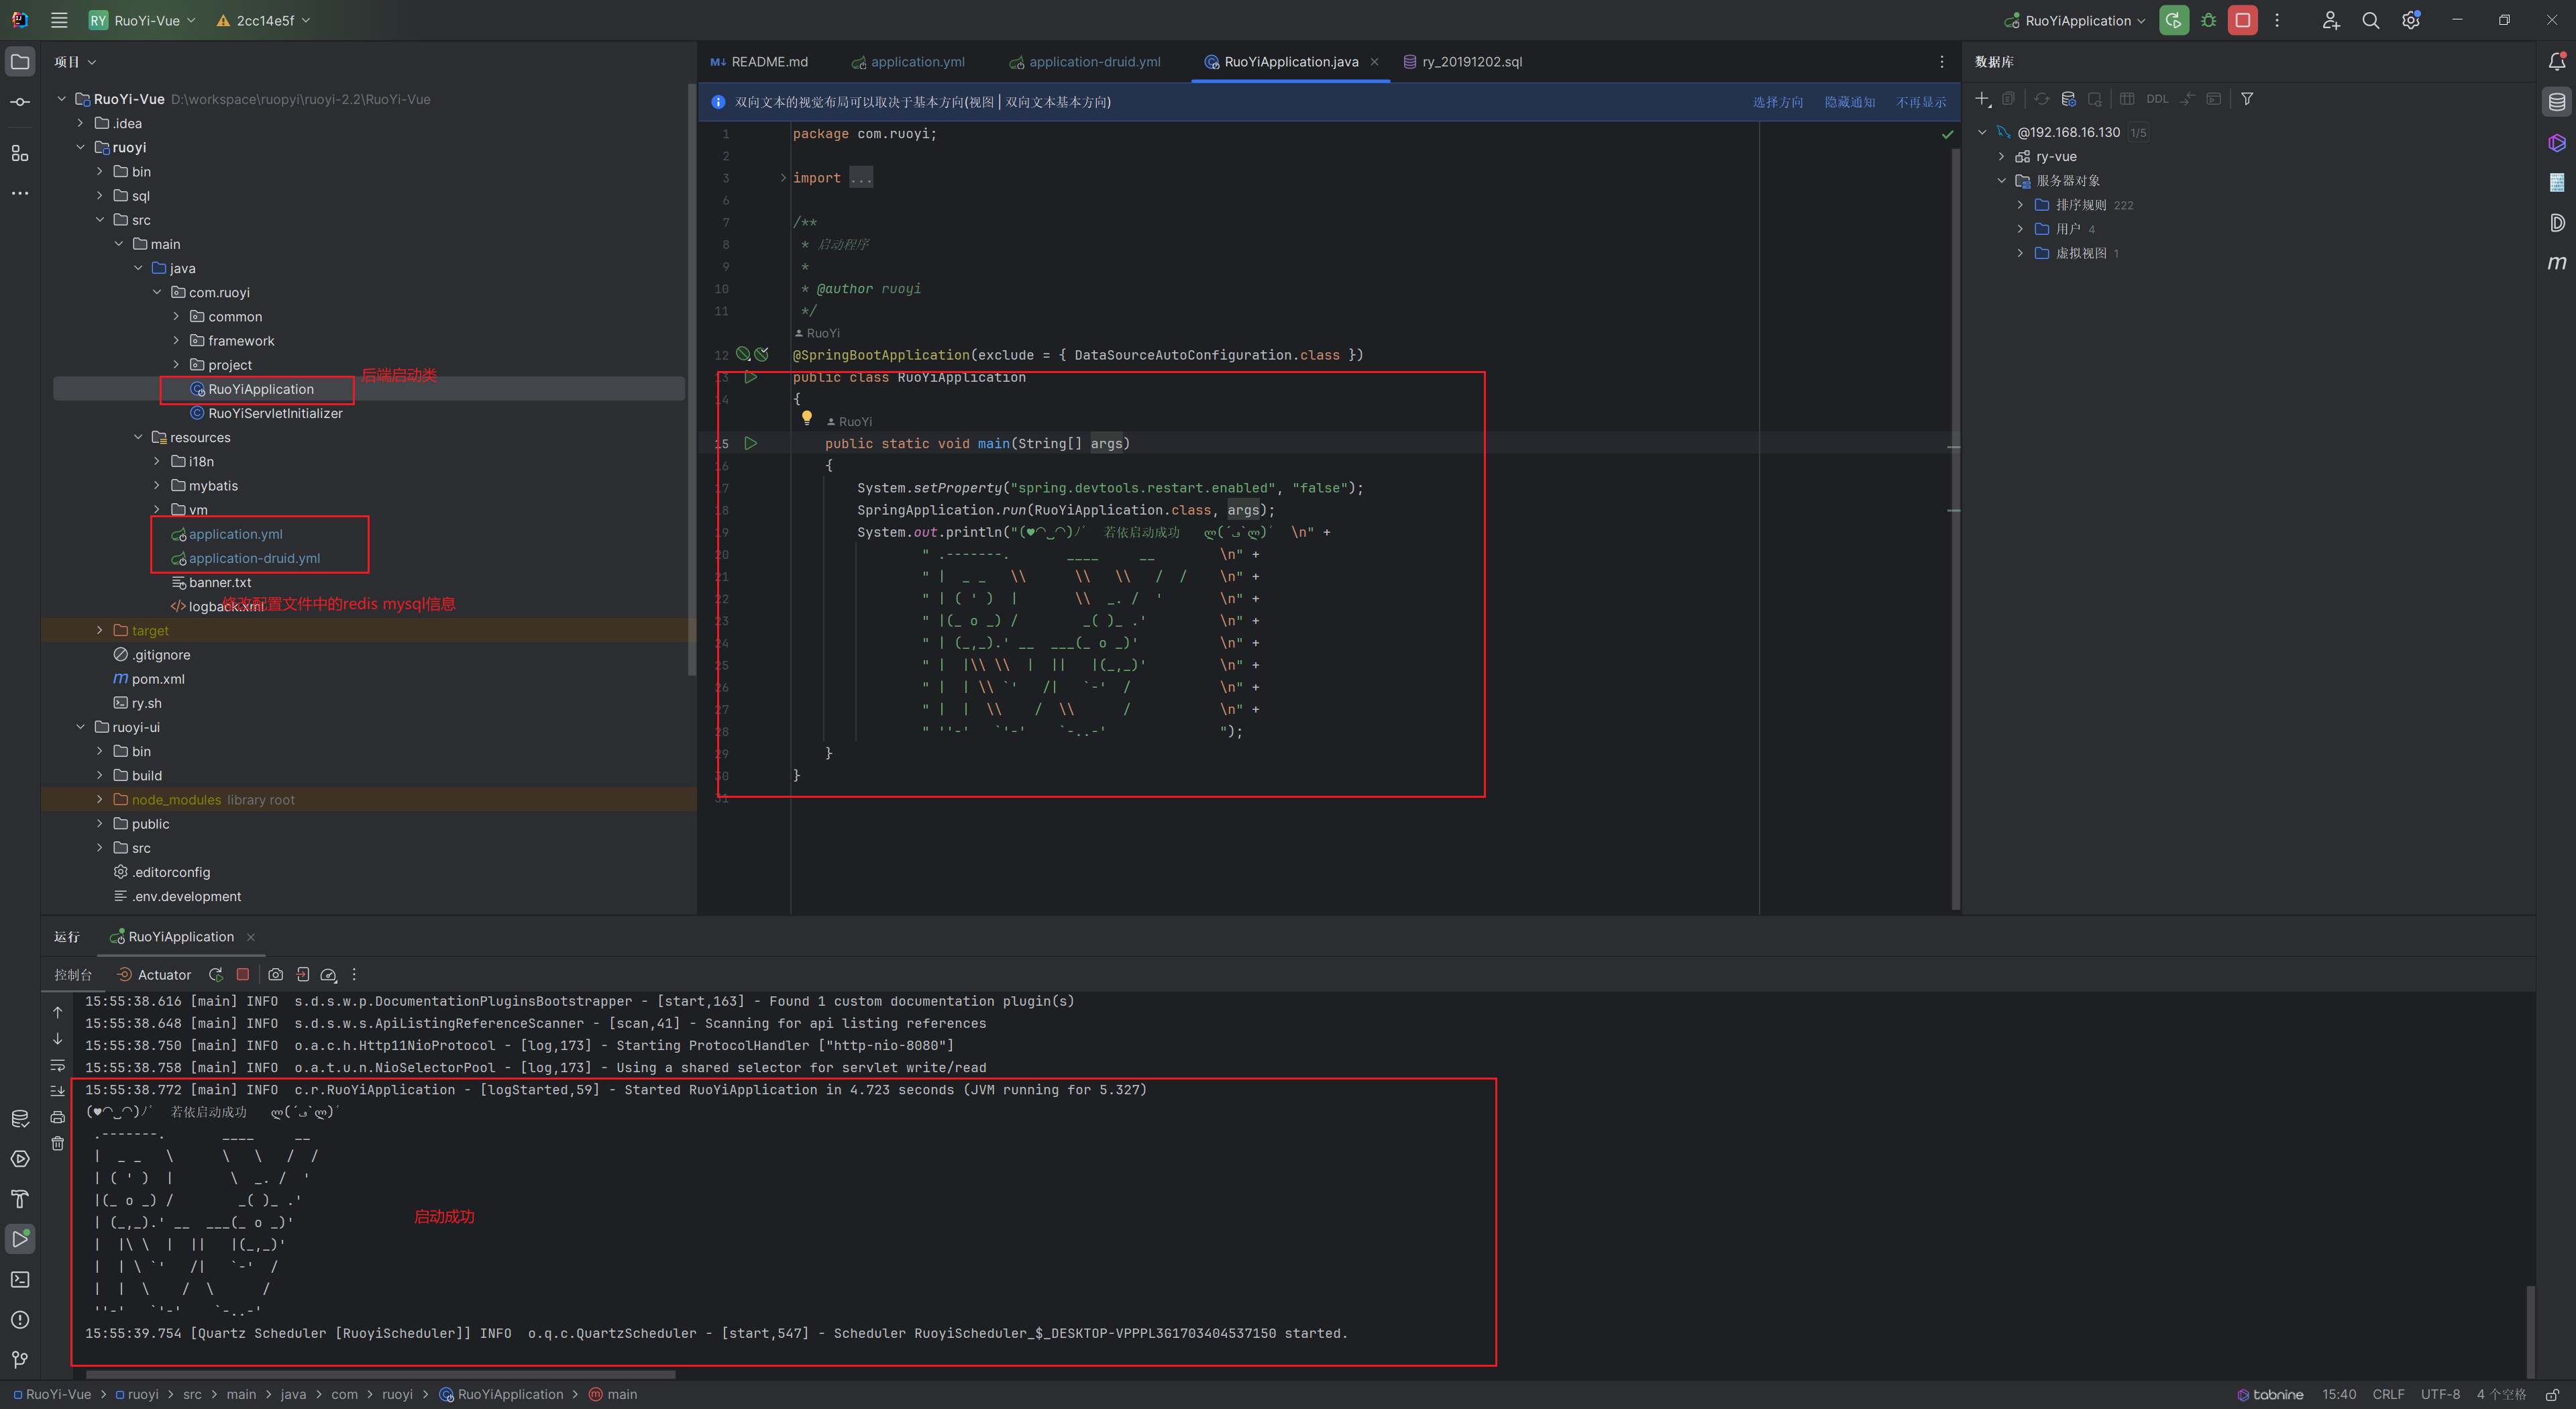
前端下载依赖组件
1 | cd RuoYi-Vue\ruoyi-ui |

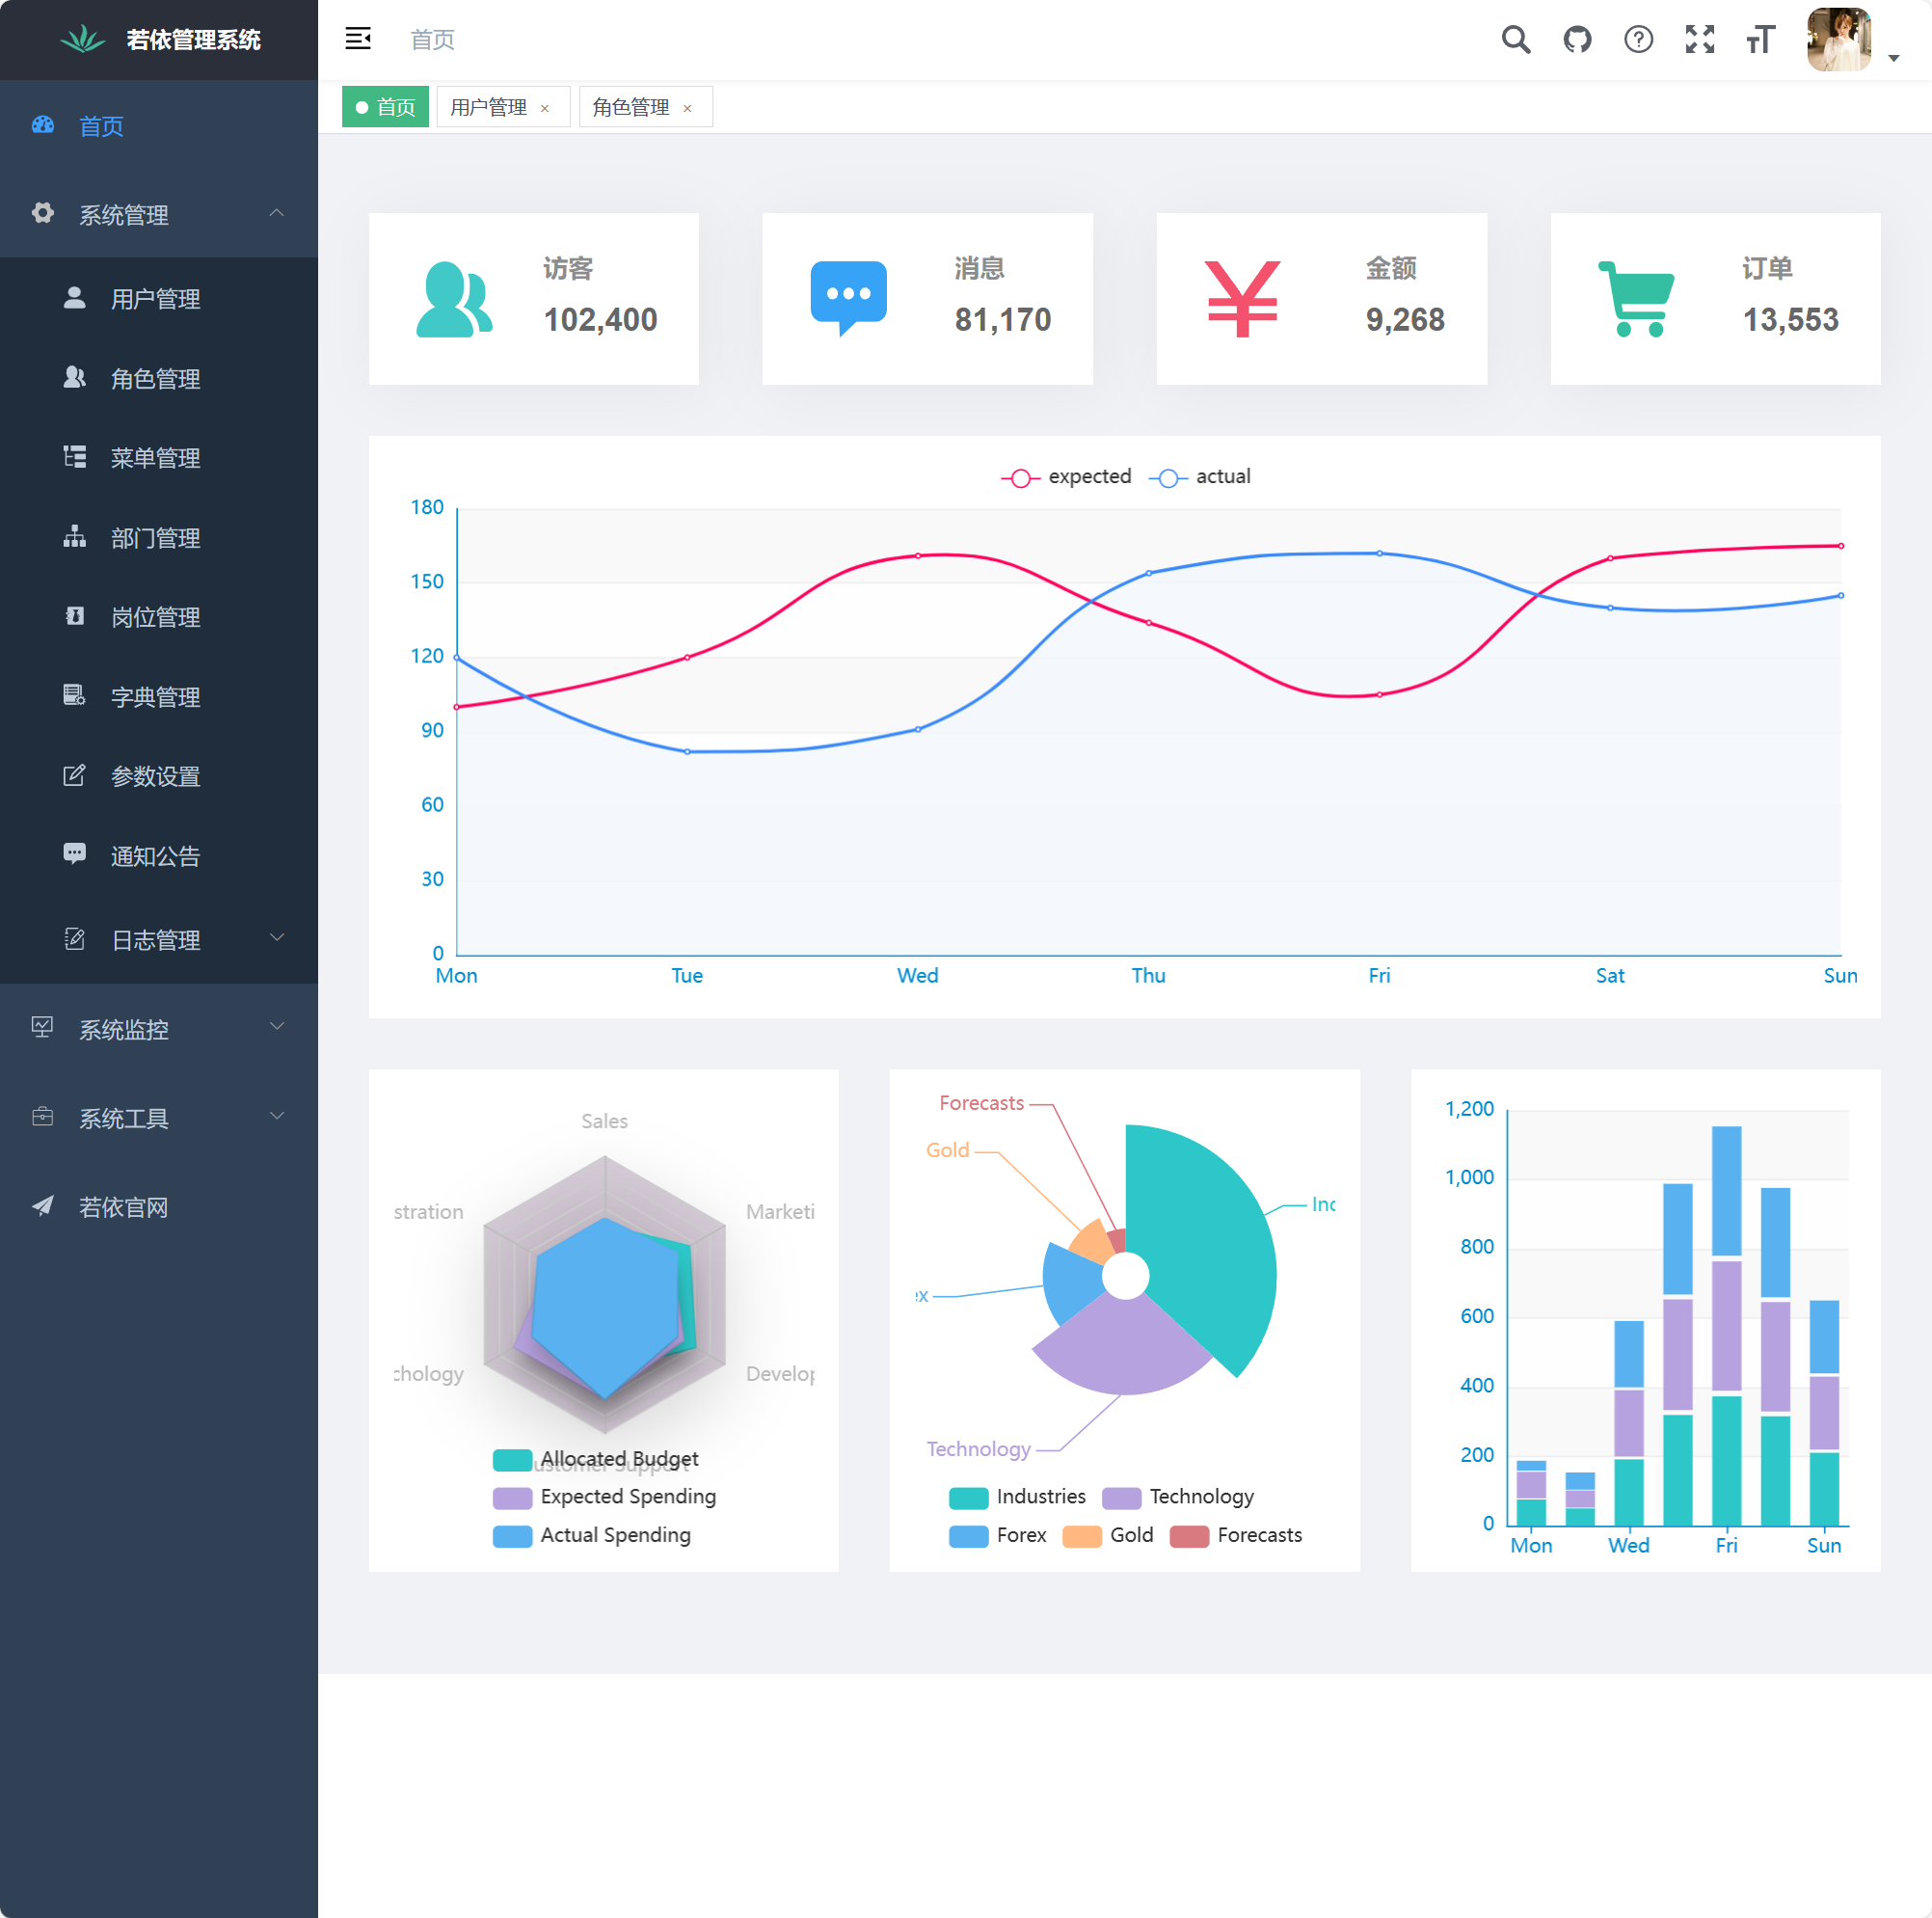
启动成功
遇到的问题及bug
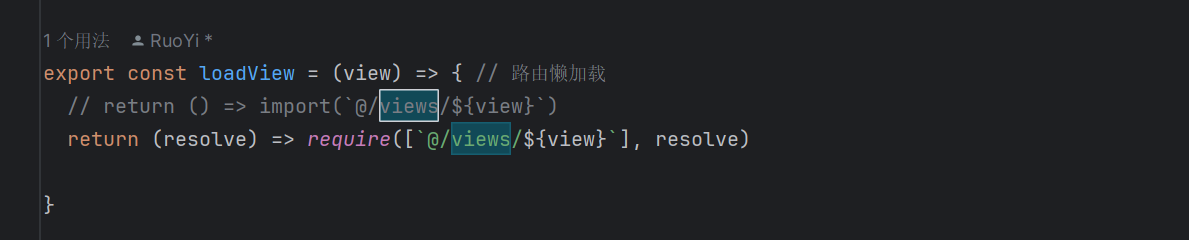
登录后发现若依 vue 版菜单点不开,报错:Error: Cannot find module ‘@/views/system/user/index’
F12 一看控制台一顿输出:
1 | Error: Cannot find module '@/views/system/user/index' |
找到代码里,对应的是 src/store/modules/permission.js
1 | return () => import(`@/views/${view}`) |
了解到是 webpack 版本问题,webpack4 不支持变量方式的动态 import ,新版本的使用 require() 来解决此问题。
解决方法
打开 src/store/modules/permission.js 文件,将加载方式修改成:
1 | return (resolve) => require([`@/views/${view}`], resolve) |
linux部署
idea打包
前端打包
1 | npm run build:prod |
后端打包
直接使用idea继承的maven工具点击打包
如下图例标记了打包输出的路径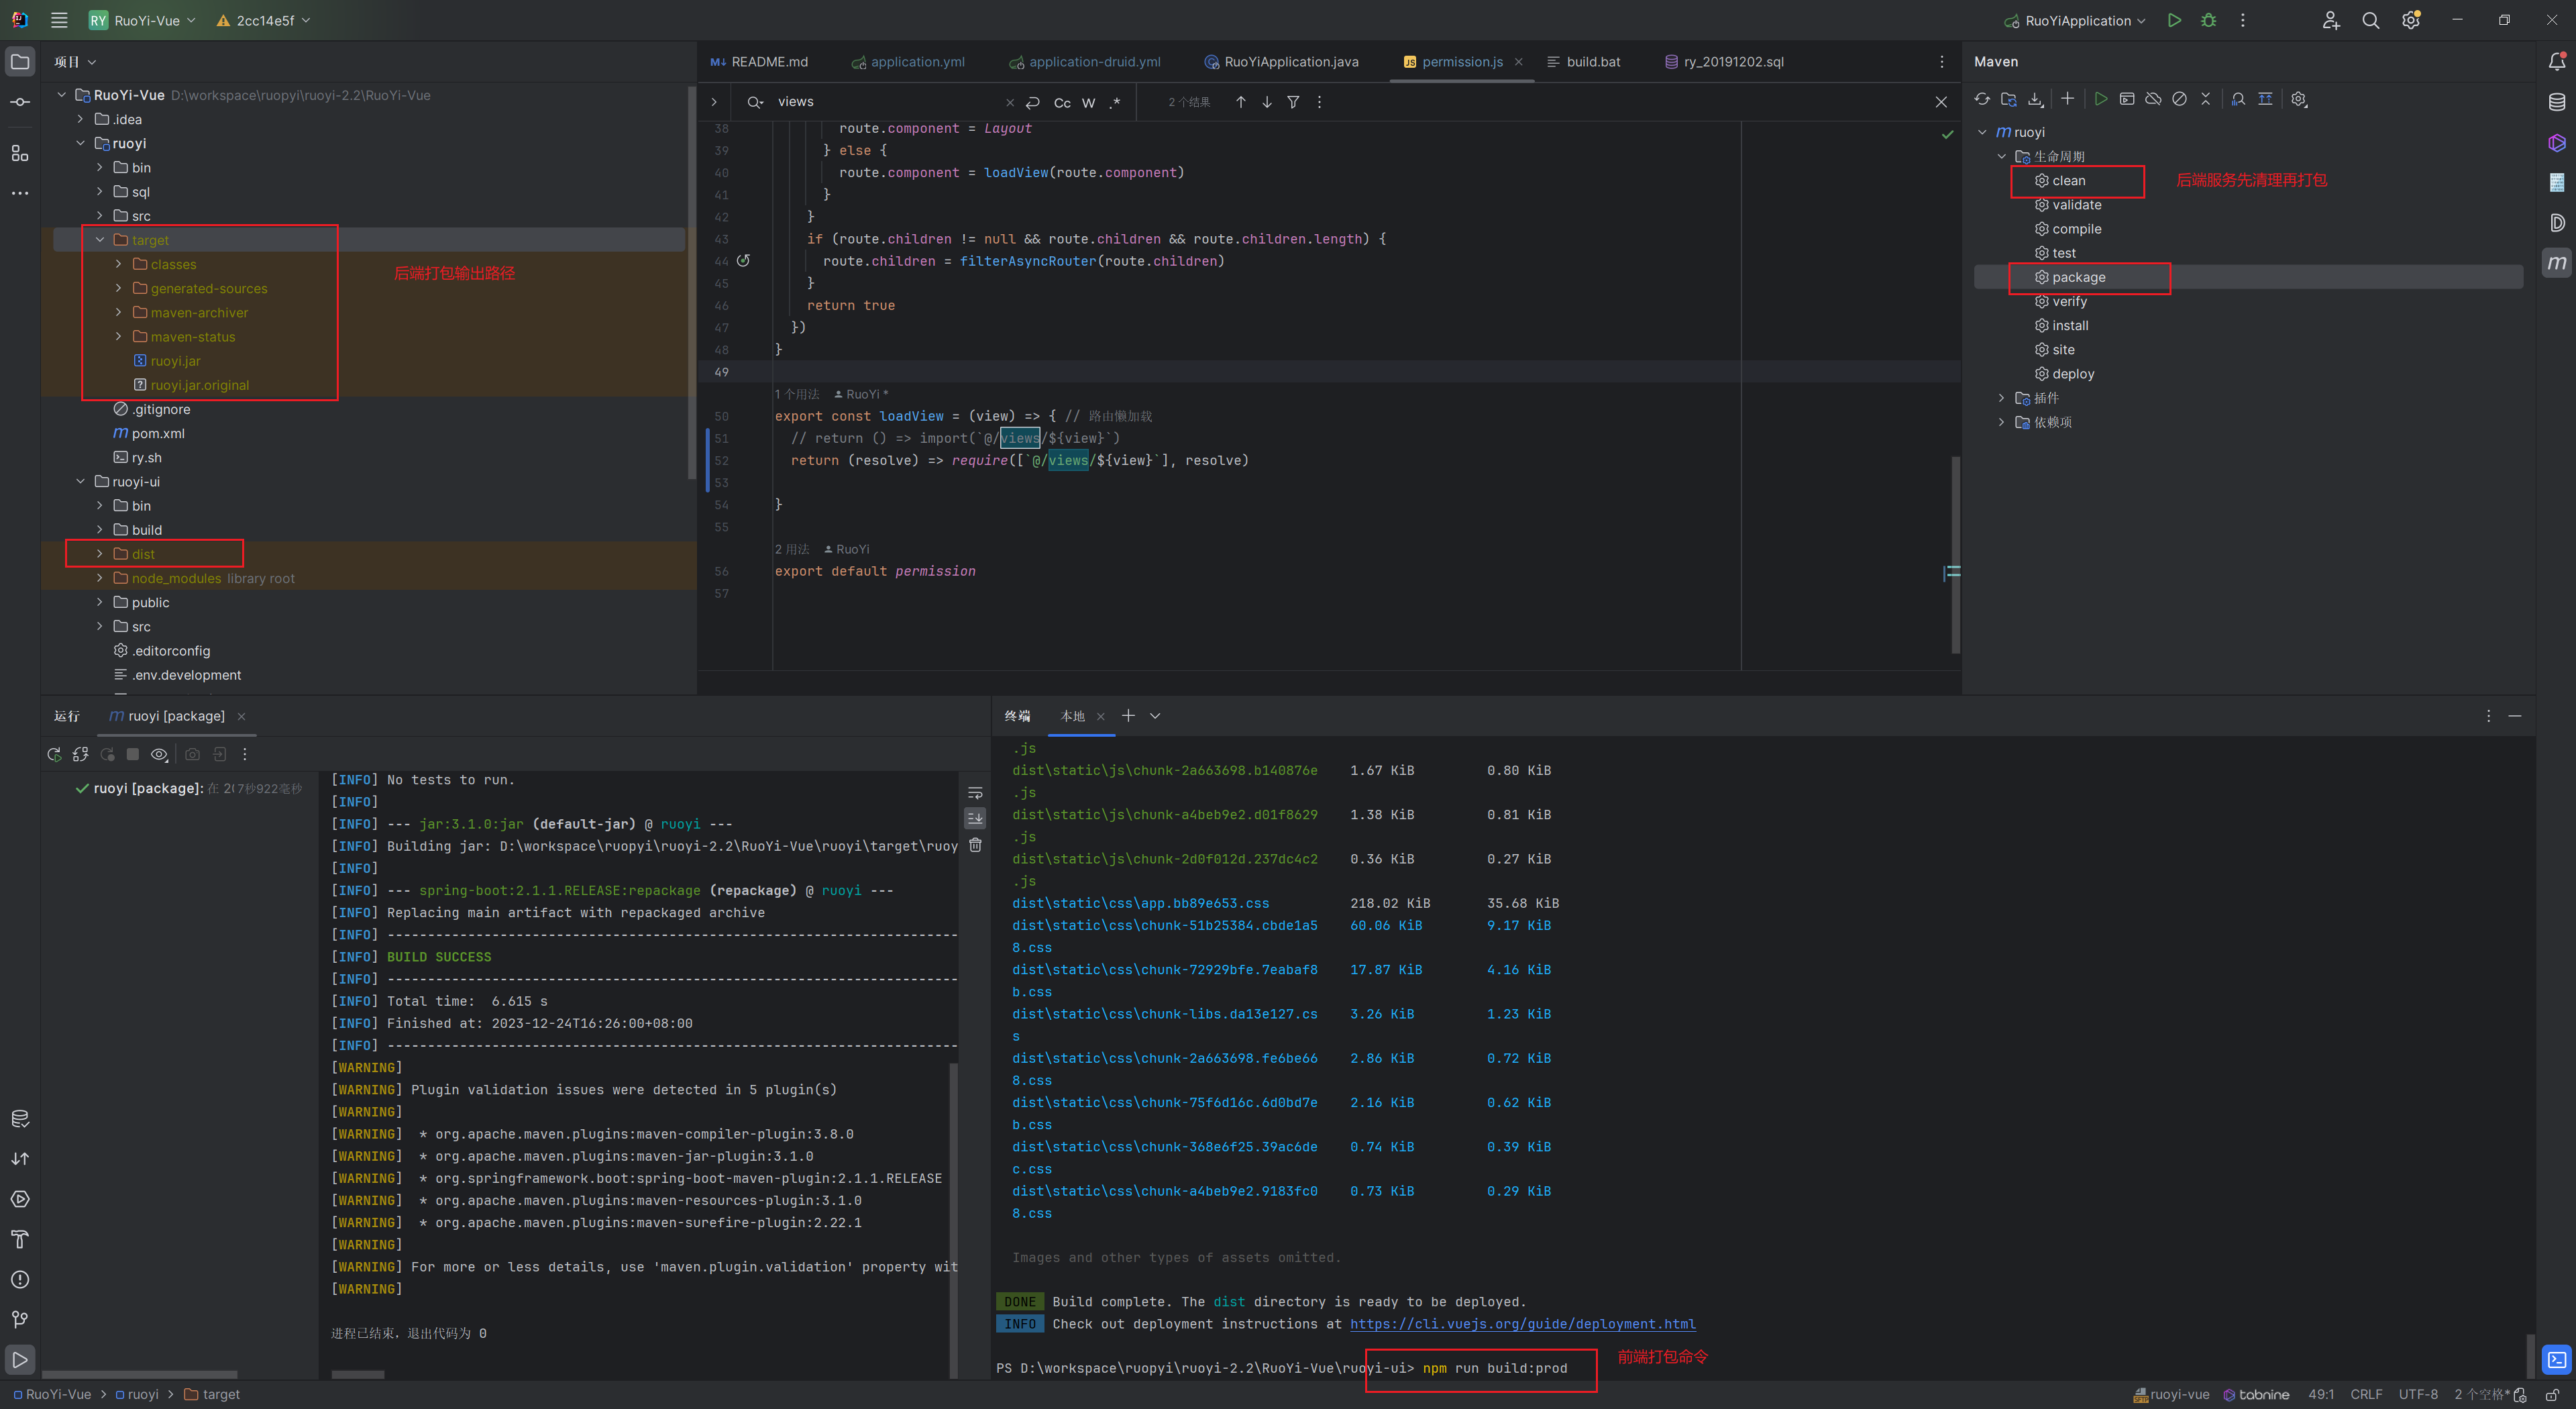
idea直接部署到linux主机
使用idea自带的配置sftp部署上传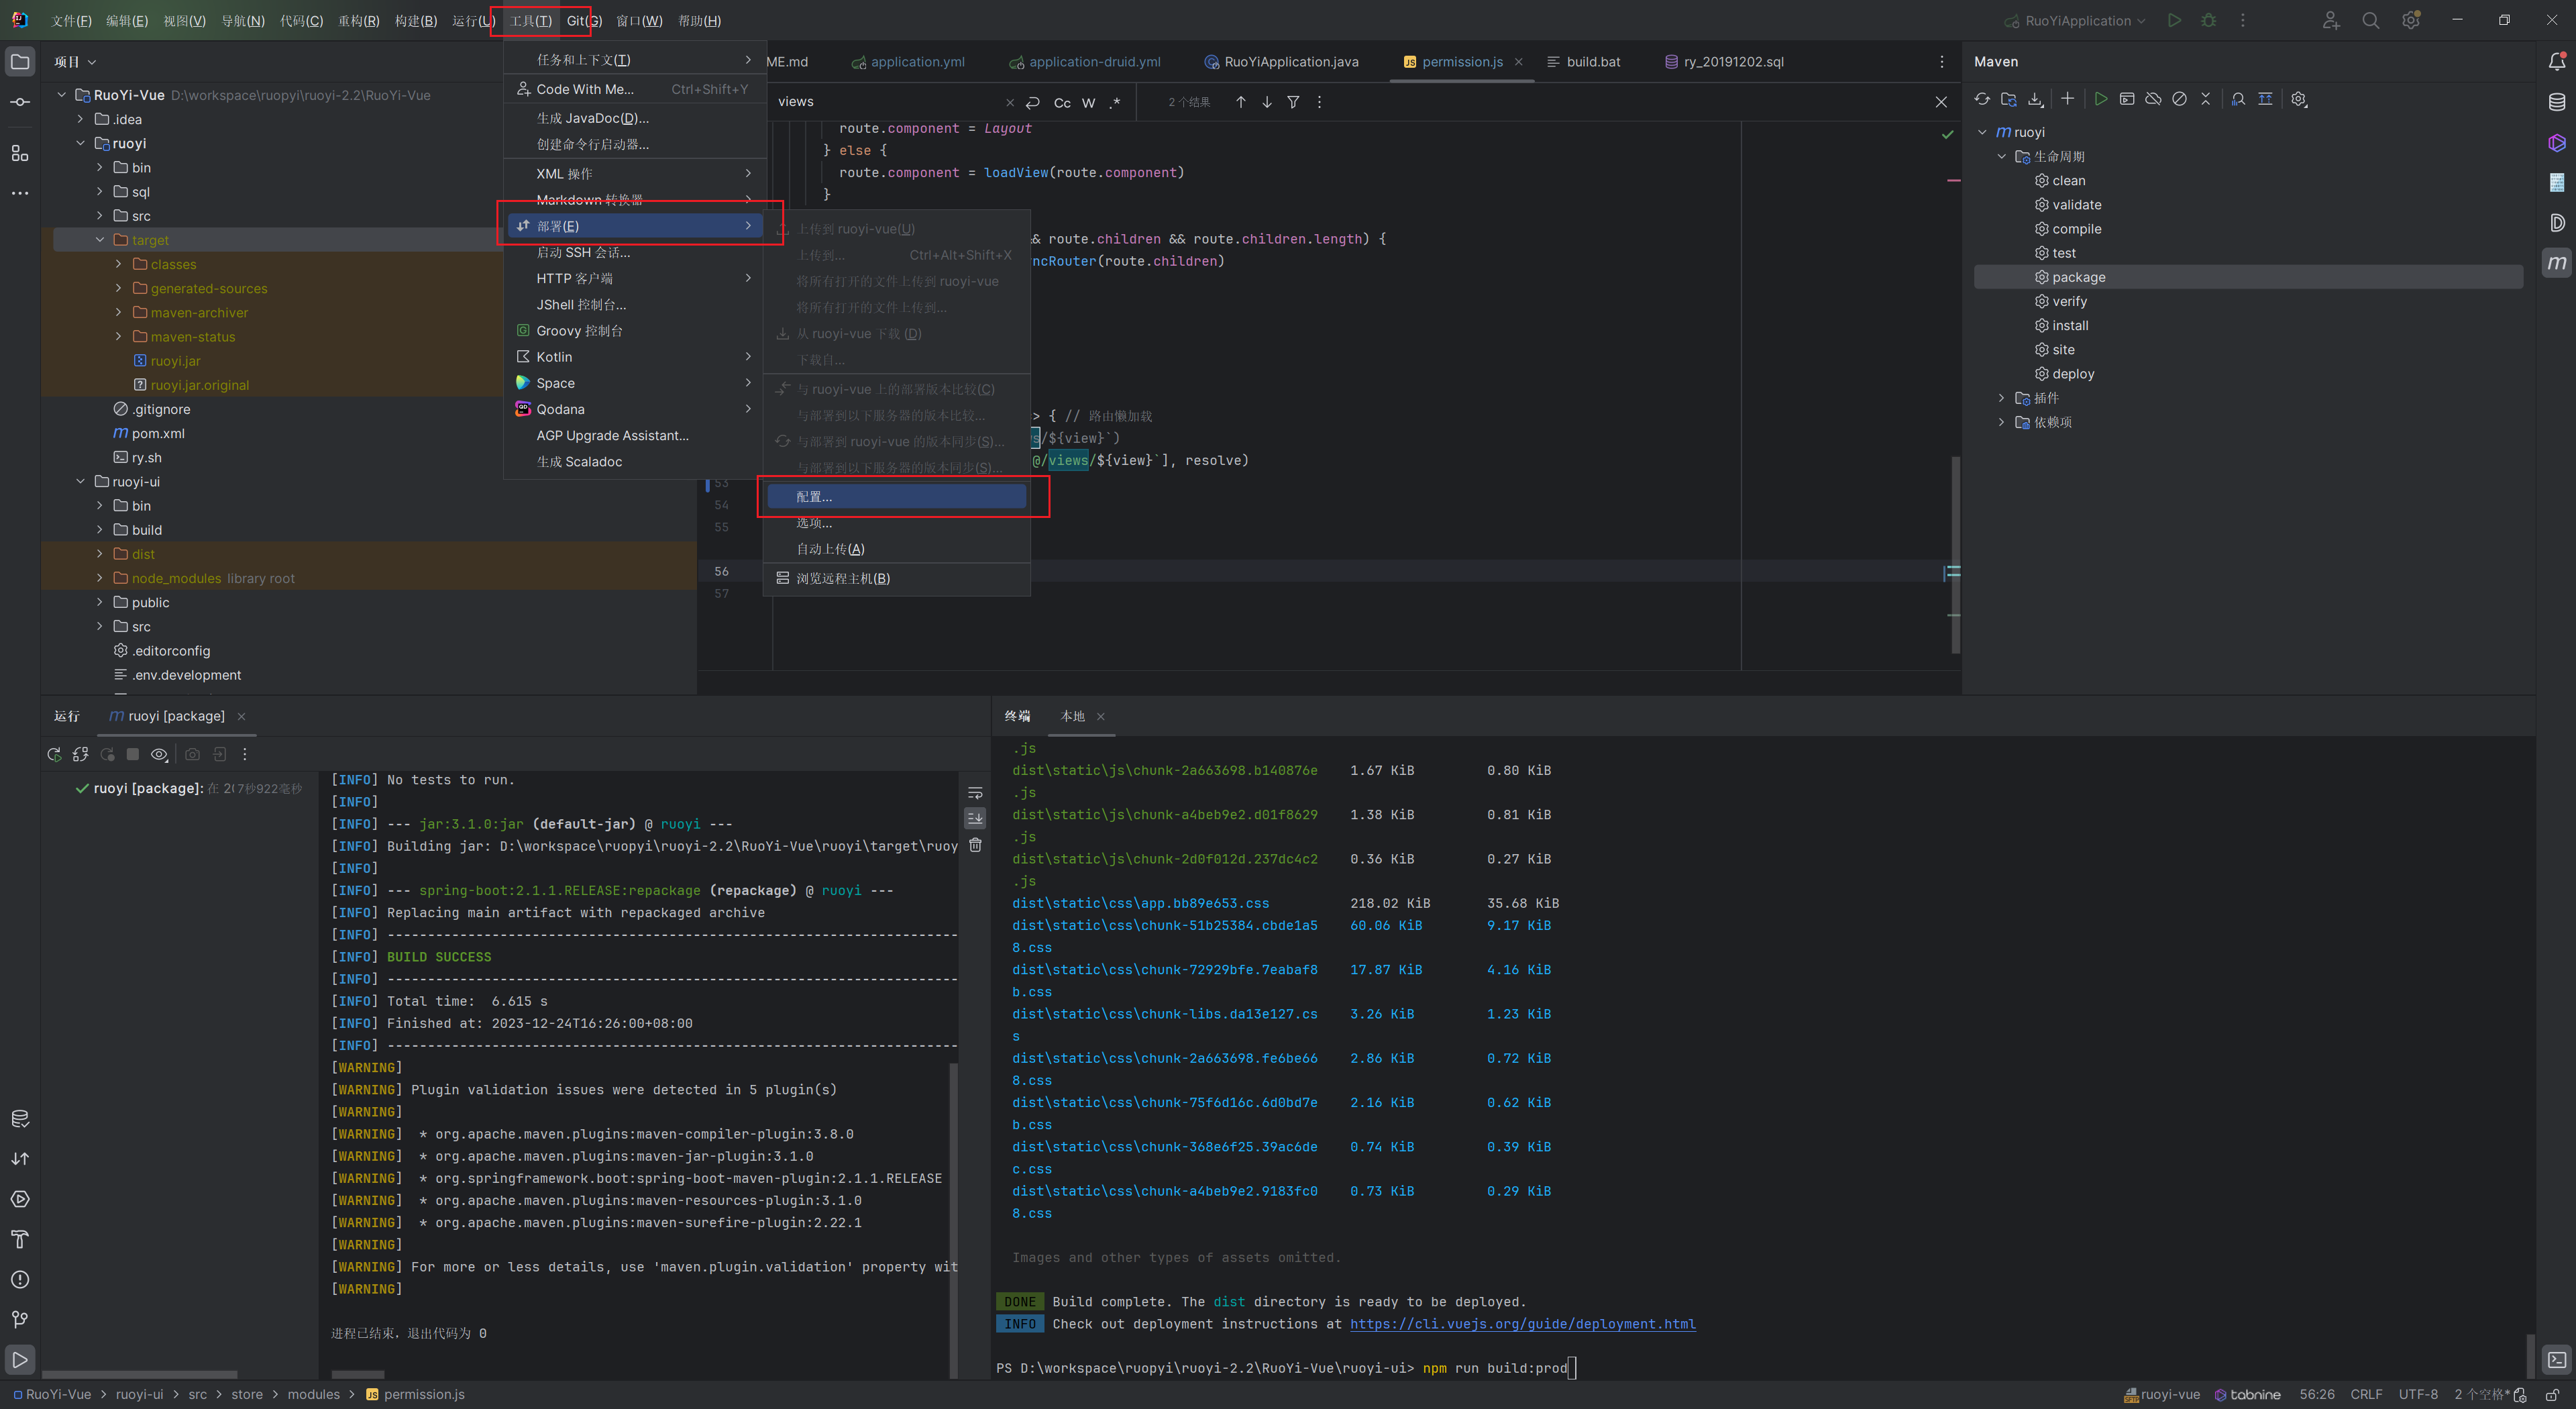
配置好sftp本地路径与目的路径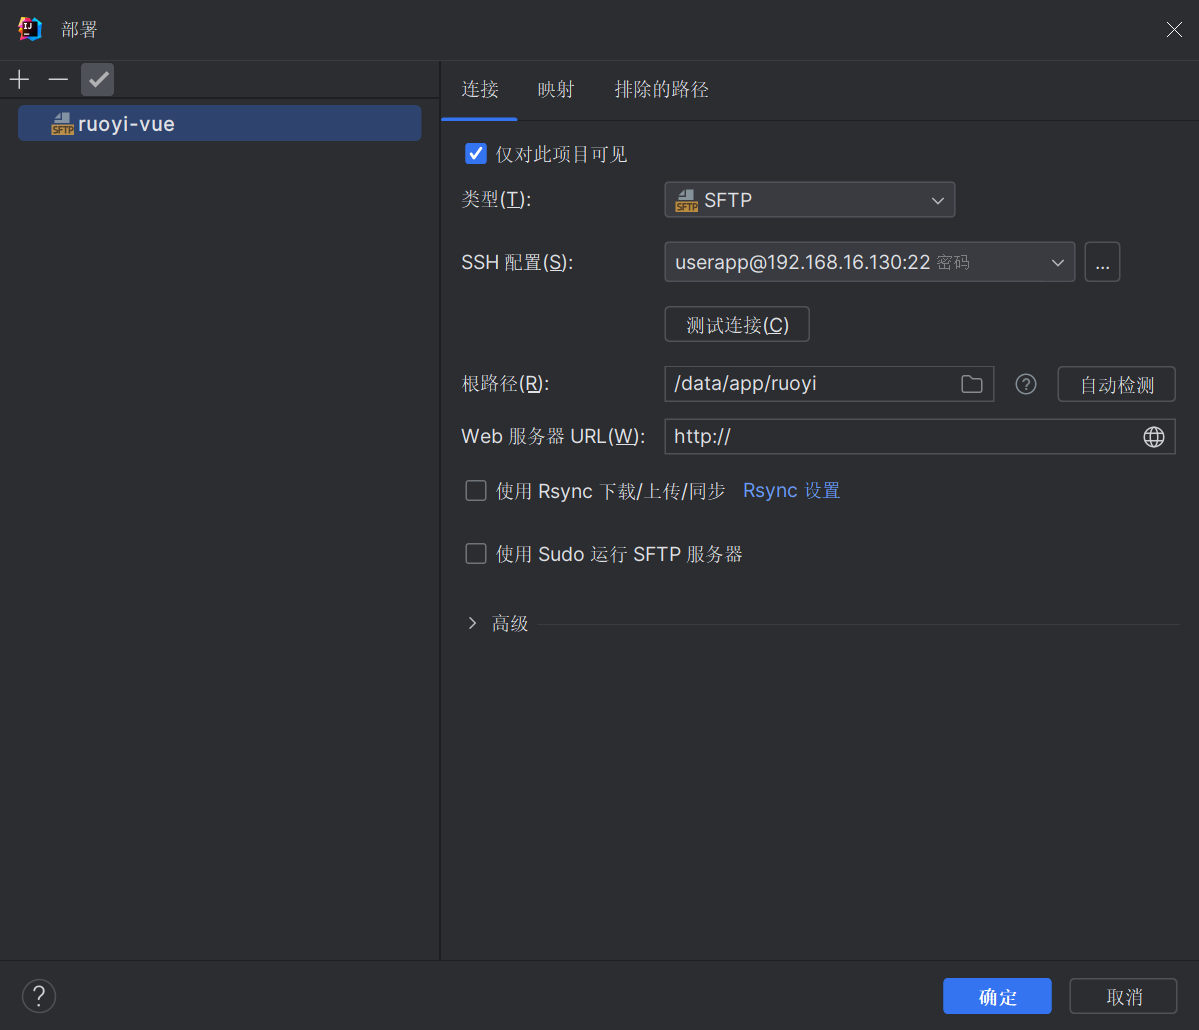
点击上传(记得点击一下项目文件路径)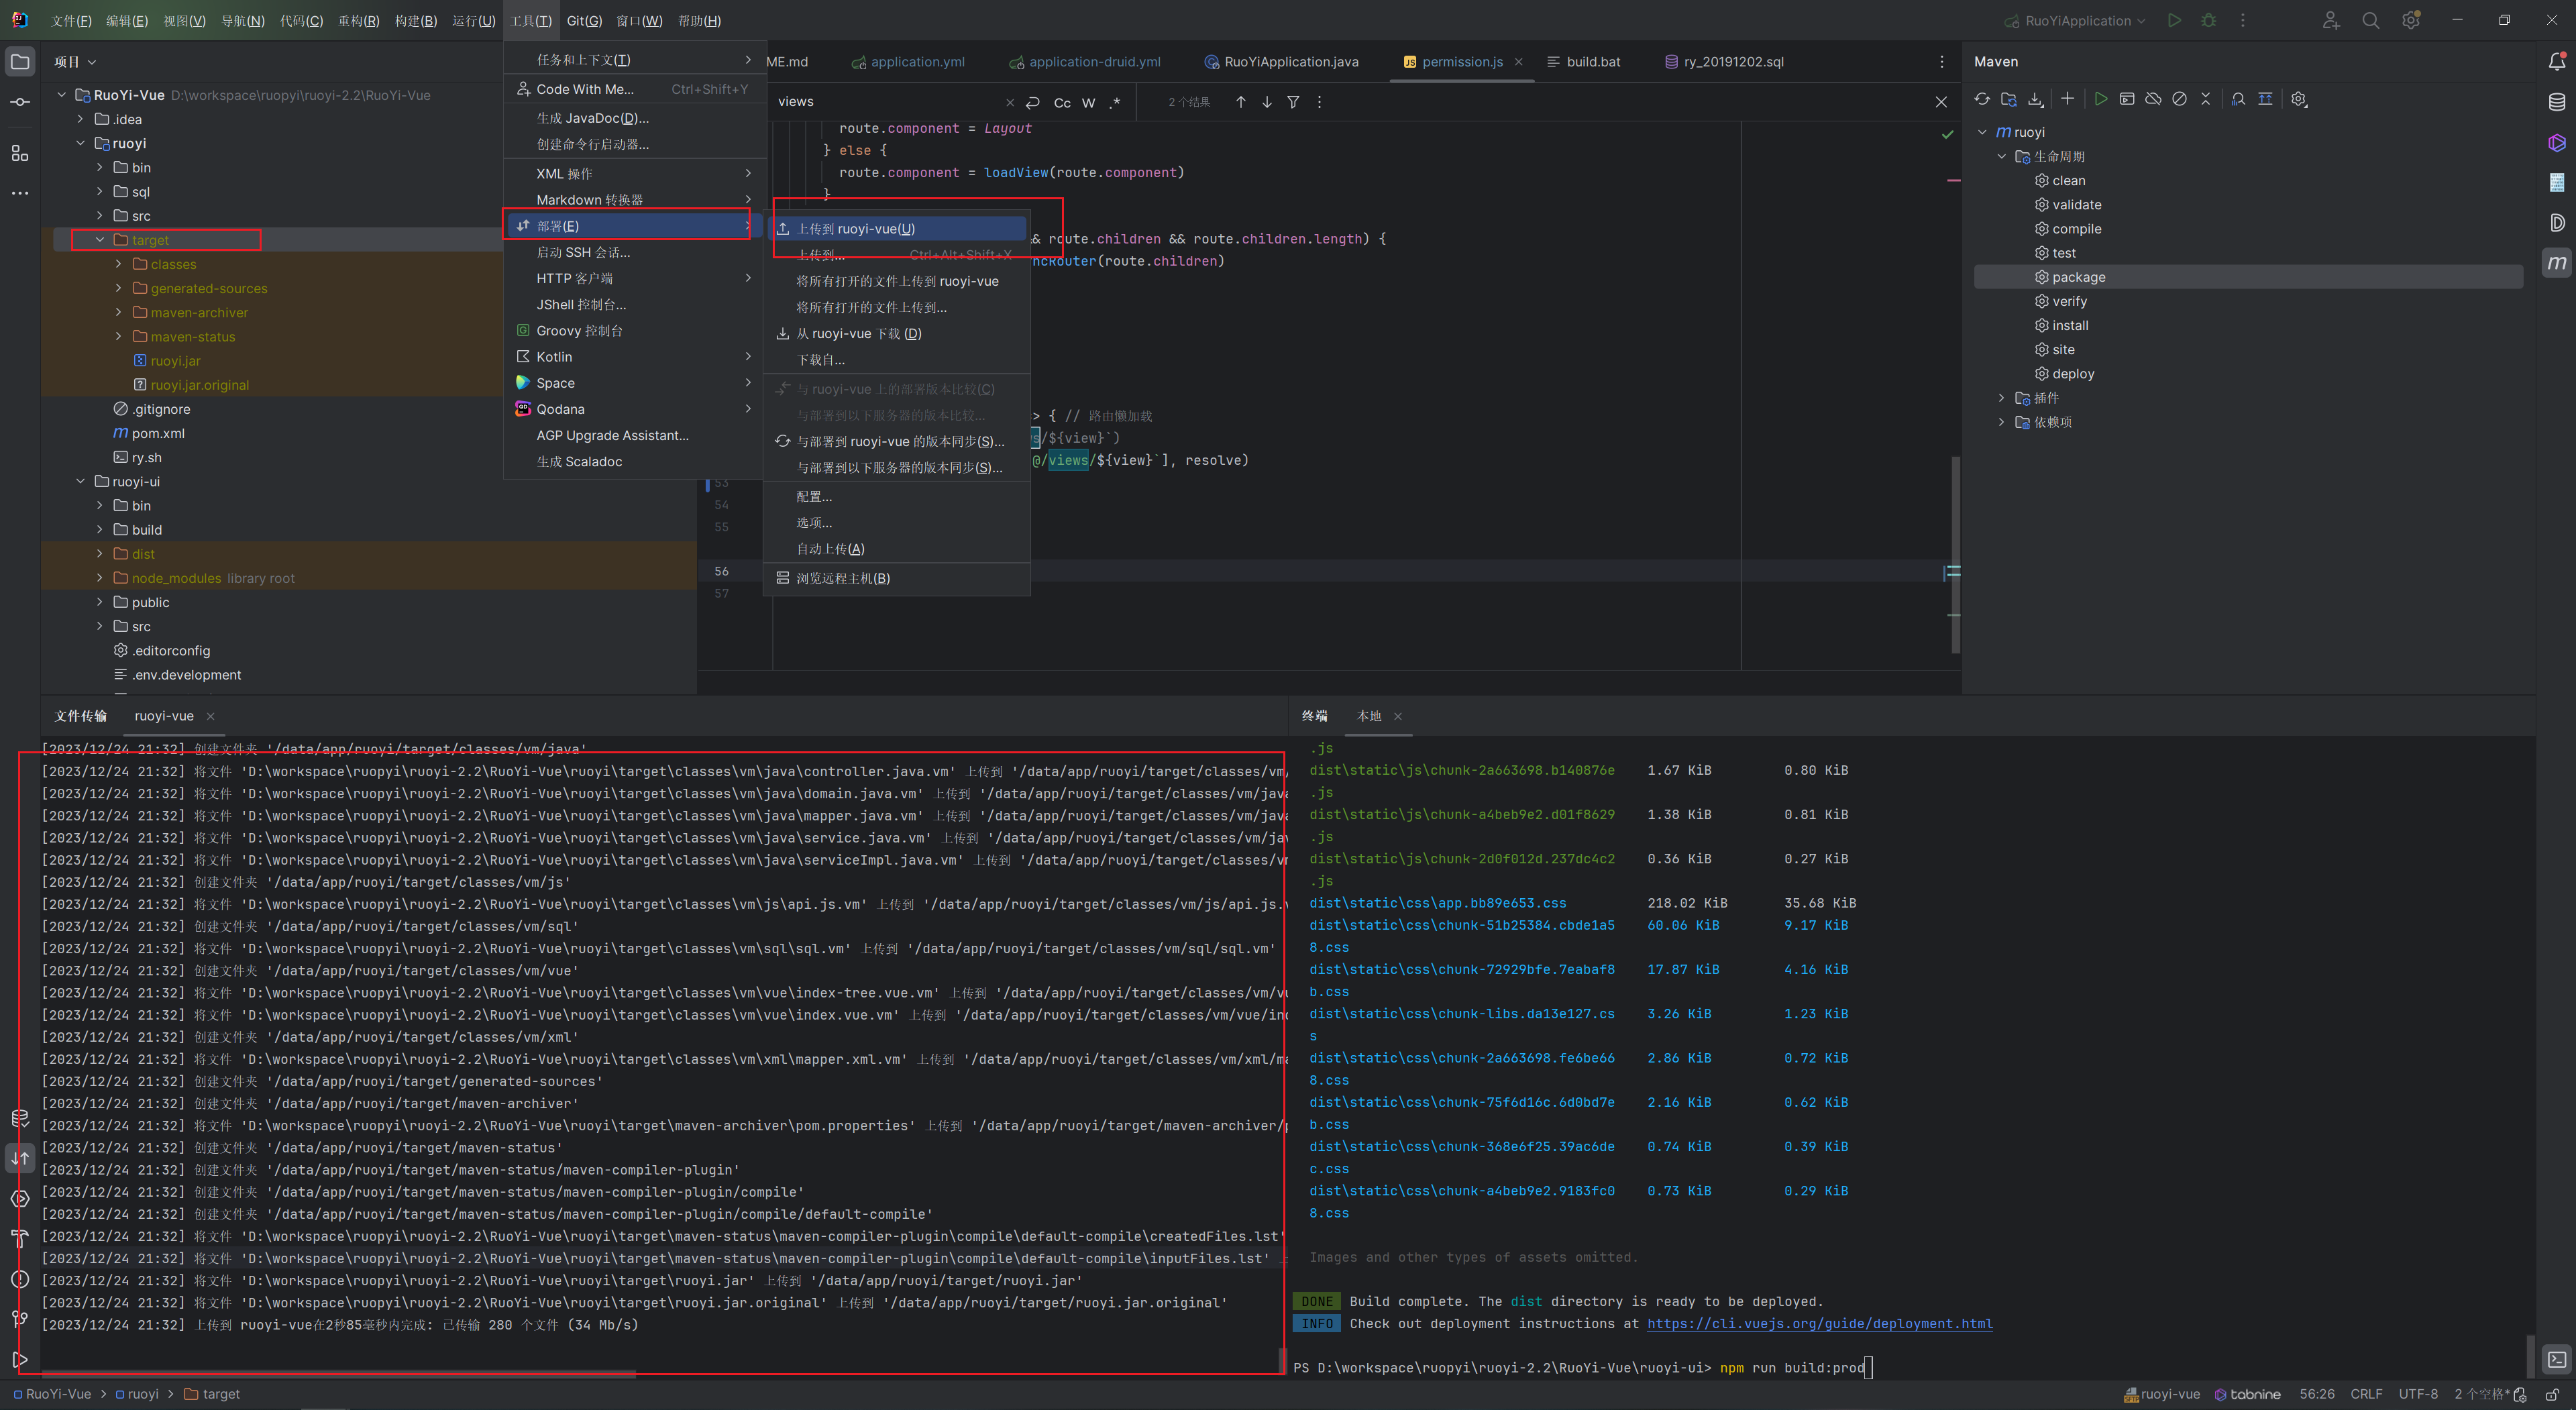
nginx配置
使用docker启动nginx,并配置好相关配置.
(我多预留了几个端口,自己按照自己实际使用配置)
docker-compose配置
1 | nginx: |
nginx的http中server结构体,参考配置如下
1 | [root@lqz-test-demo conf.d]# pwd |
docker 网段确认
容器内的IP可以通过如下命令查询
1 | [root@lqz-test-demo conf.d]# docker network ls |
1 | [root@lqz-test-demo conf.d]# docker network inspect kafka_default |
前端部署后测试
除了验证码不显示外网页可以正常显示
后端启动
1 | java -jar ruoyi.jar |
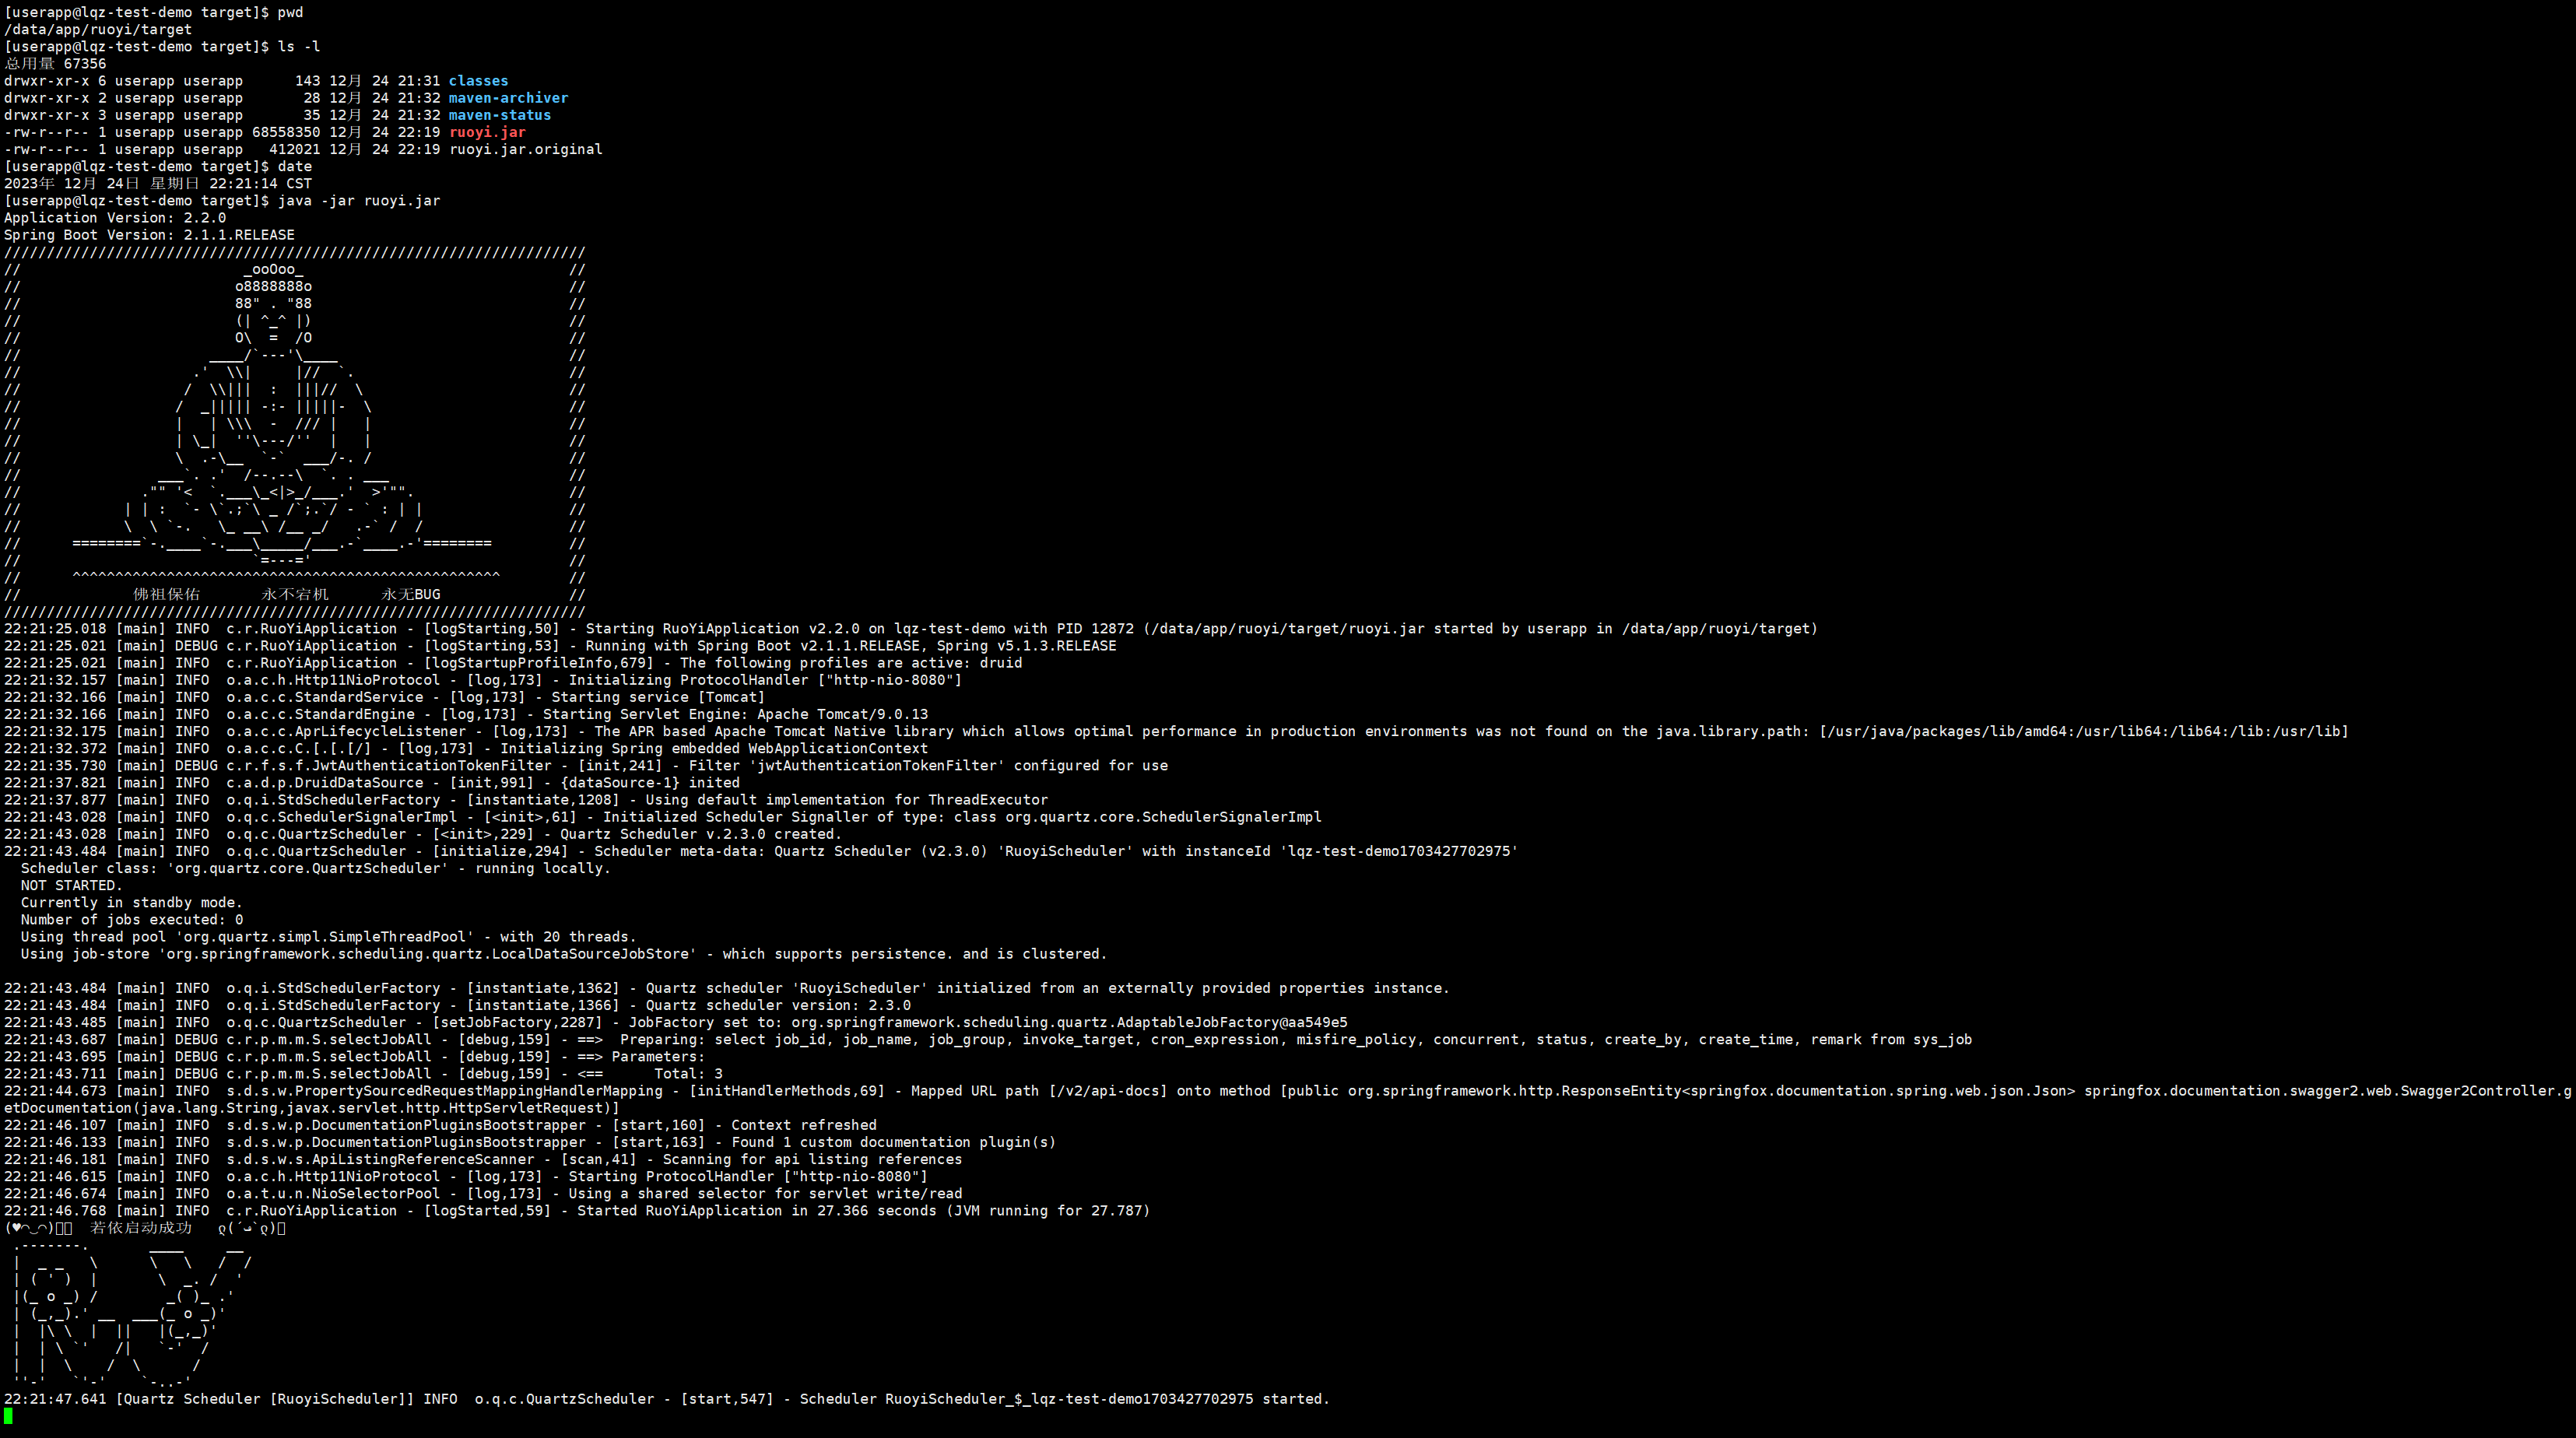
此时再查看页面,验证码已经正常显示
启动时有报错
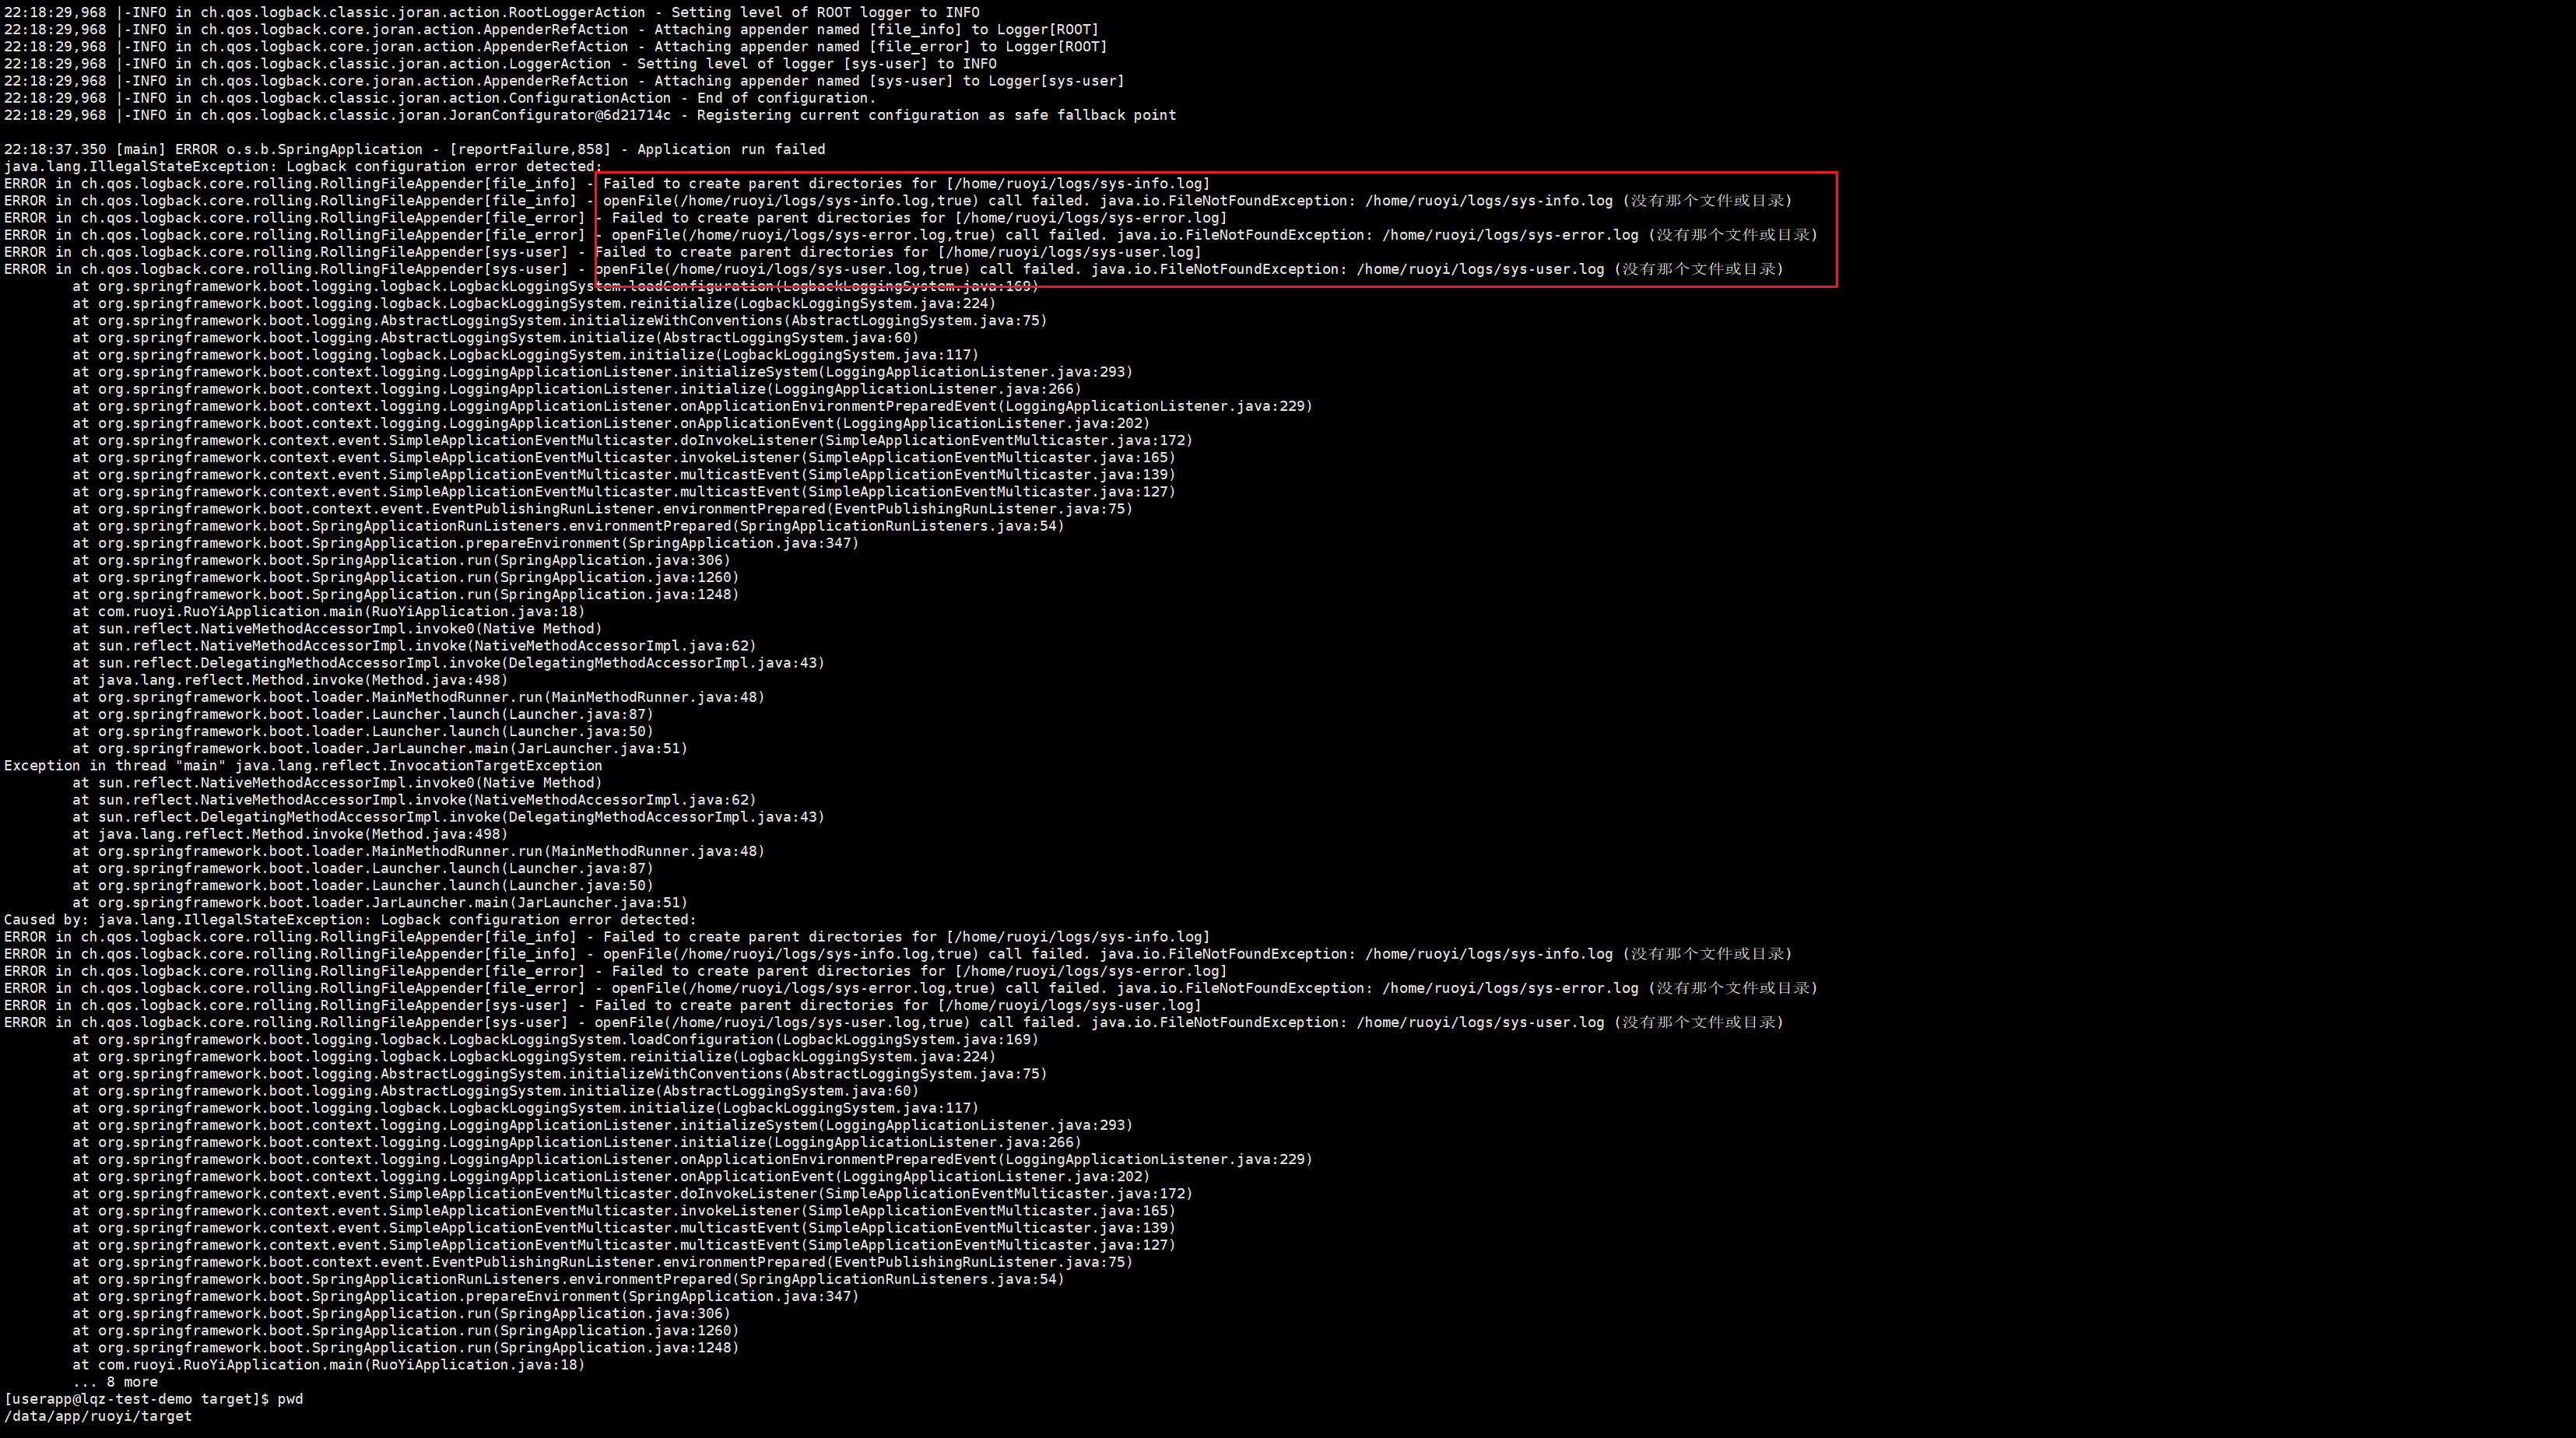
需要修改log目录再重新打包上传即可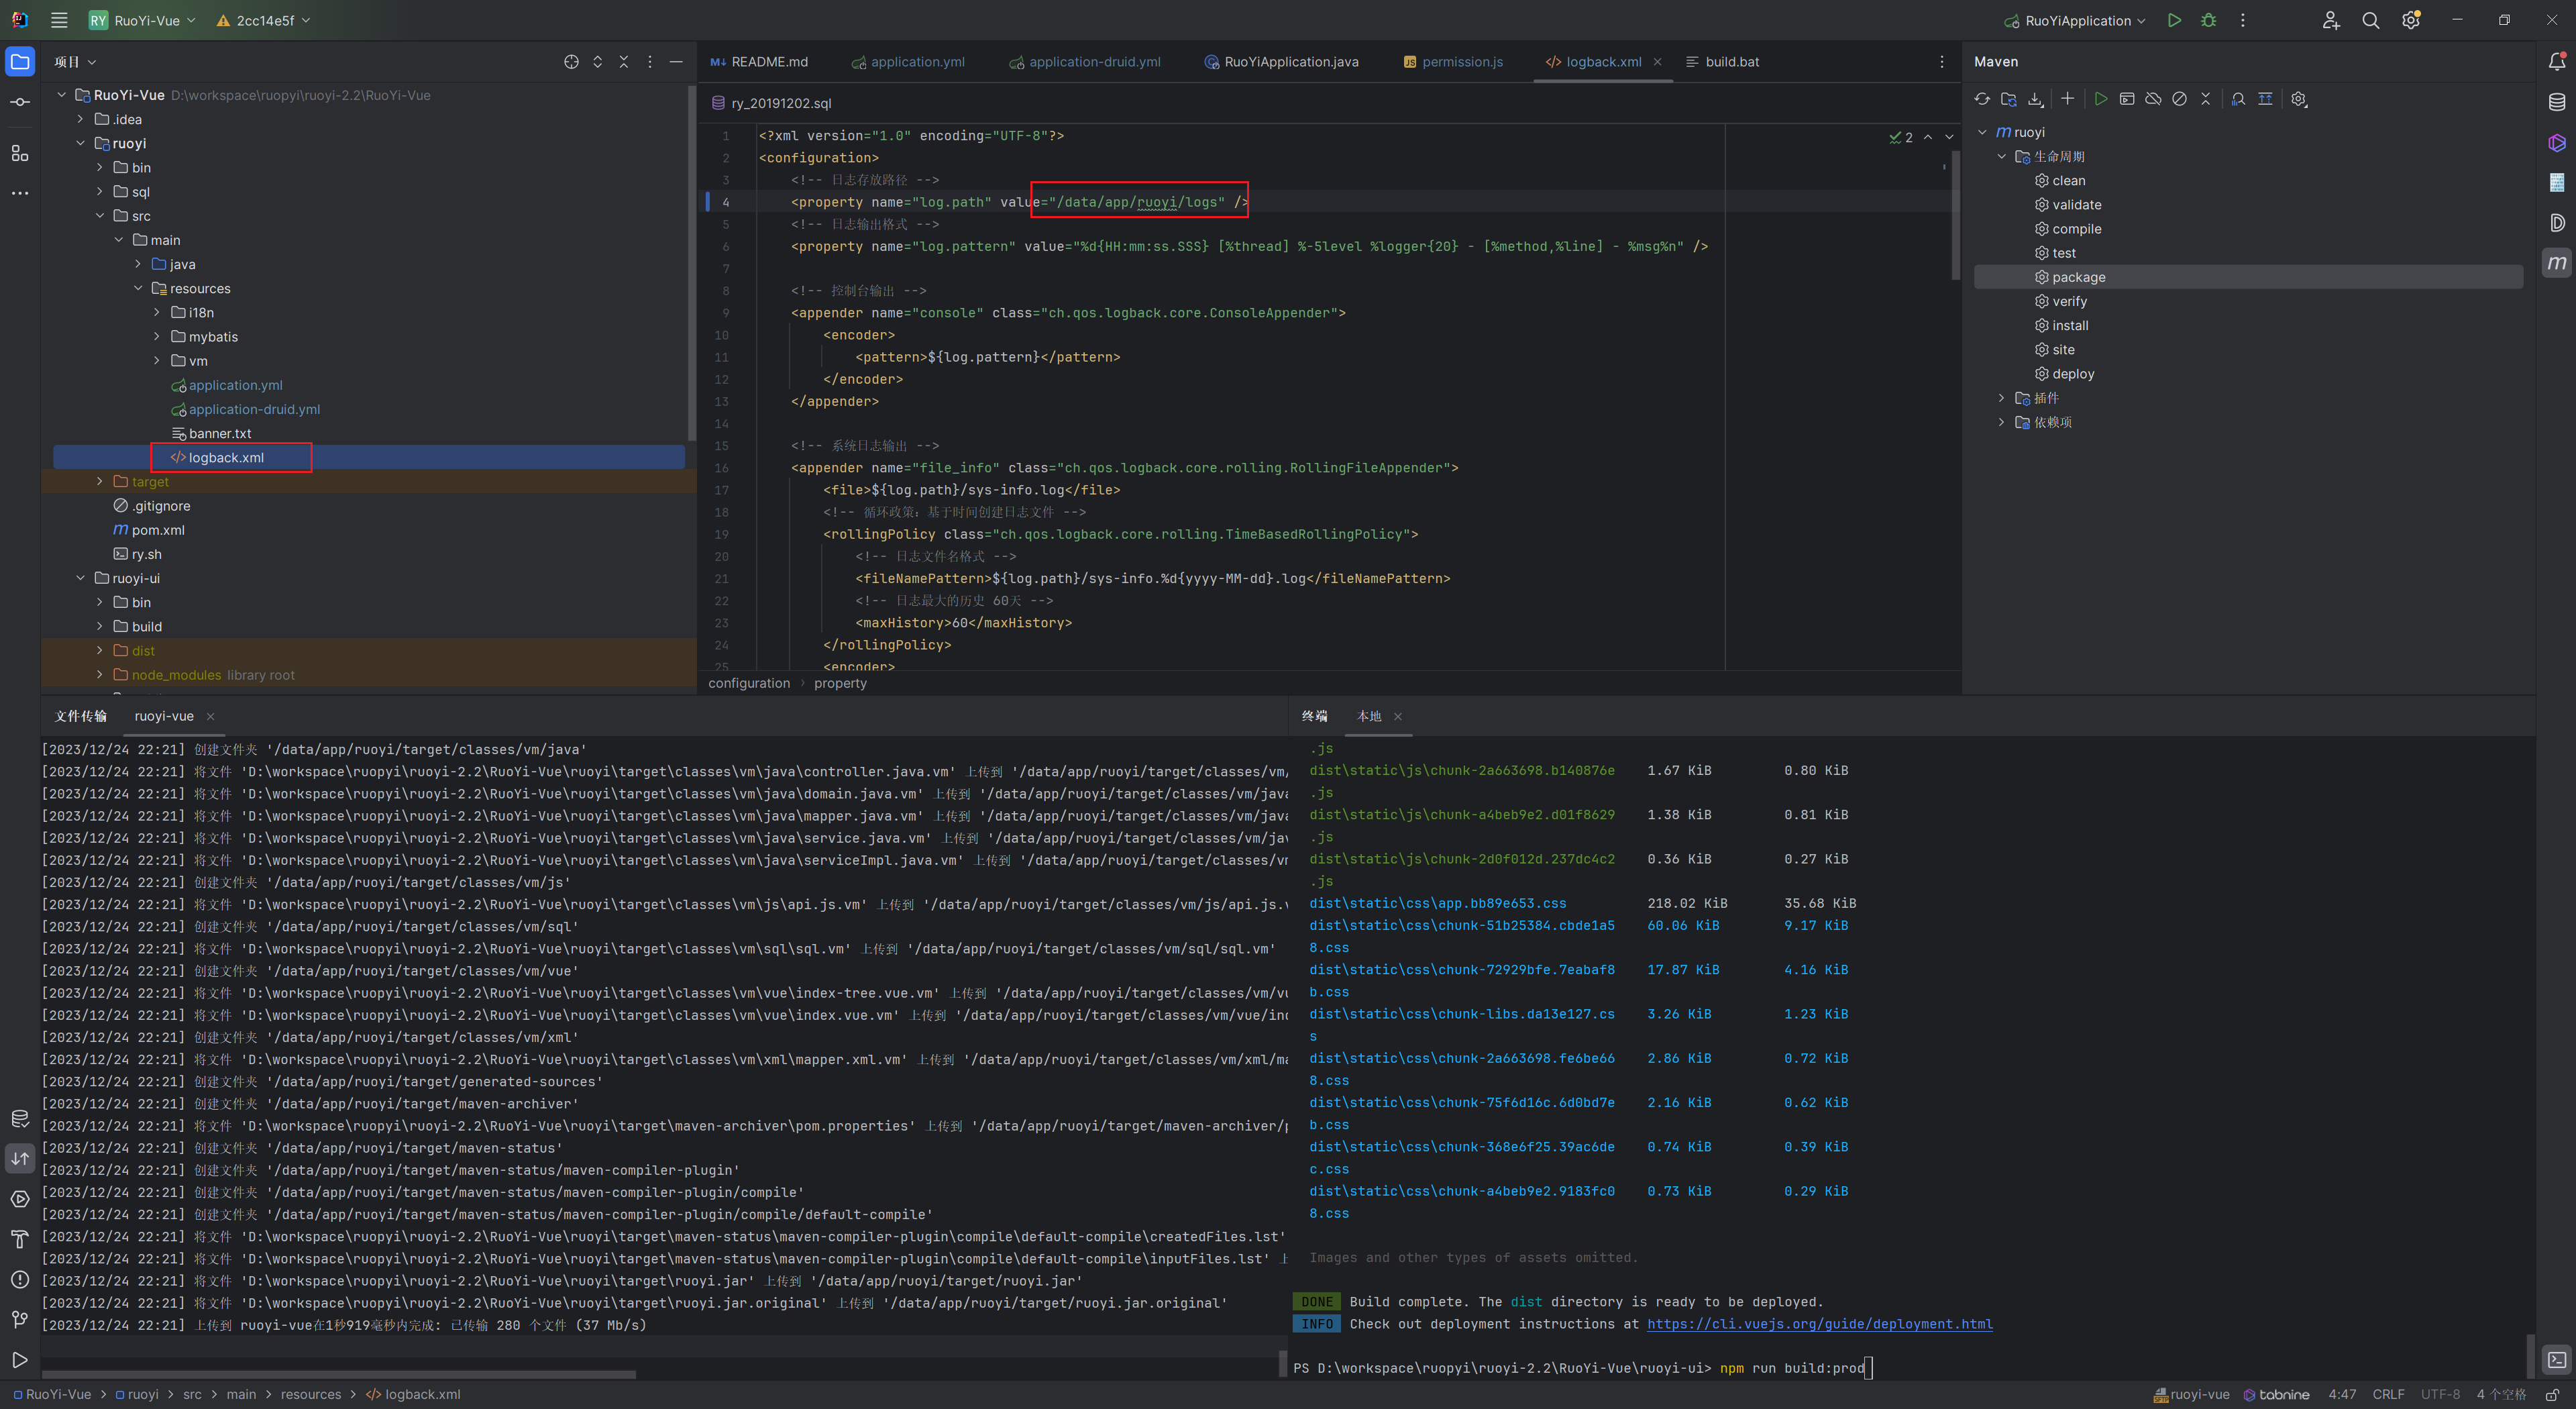
登录测试成功
至此部署已经完成